
Cvcrcr's 99 Civic EX project (Turbo.. woohoo!!)
#71
 06-15-2009, 03:59 PM


Well, the turbo project will be on hold for a little bit
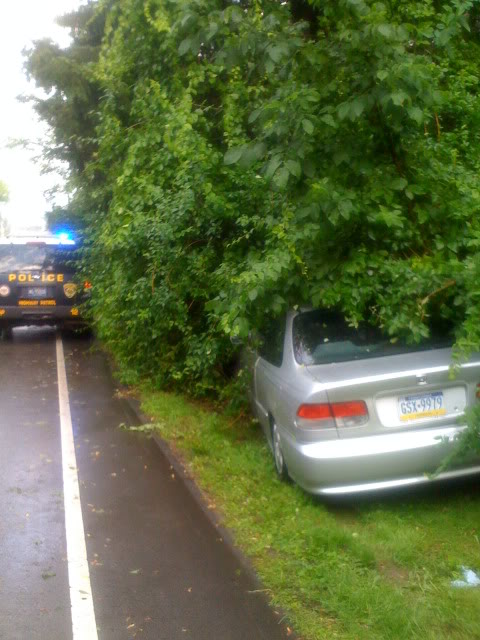
Story: While driving up to Bucks County (about a hour away) to pick a few random parts for the Civic, it started to rain. No big deal. I got off the highway, as my GPS instructed me to, and continued down a road following a mini-van. It's begins to pour, and then hail..maybe like the size of nickels or so, then everyone in the front of me slams on their brakes. I hit the brakes, and moved away from hitting the back of the van.
I ended up destroying about 5 little bushes and running into the big bush you see in the pic. Since it was raining, I couldn't get traction in order to back out. Cops came and had a tow truck pull me out (which cost $115....ugh.. hopefully, insurance will take care of some of that.) Here's some more pics of the damage. They are from my cell phone, so the quality may not be the best.
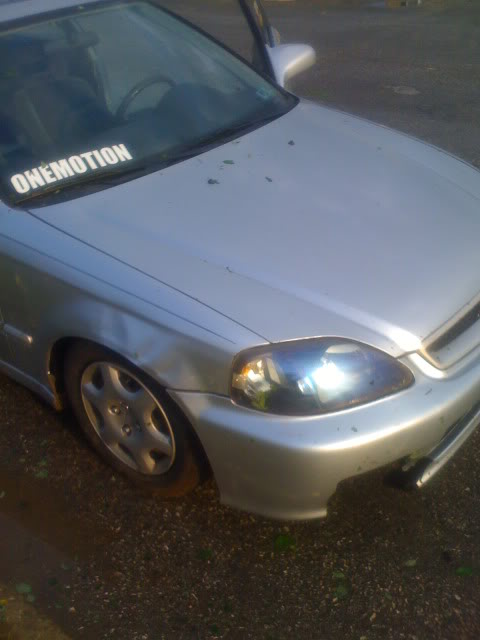
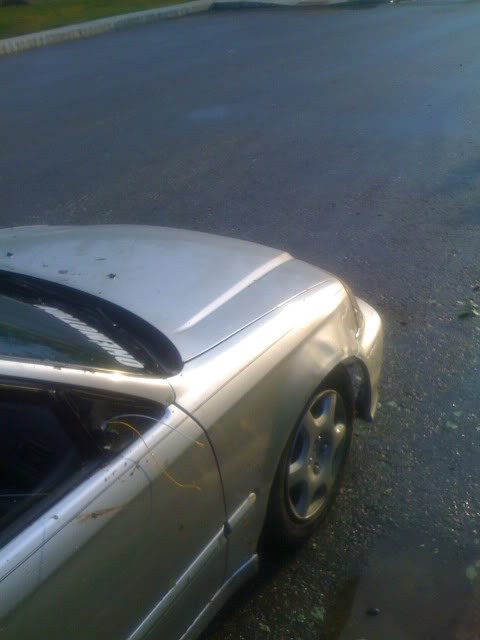
All in all, I need at least a new front bumper, pass. fender, and pass. side mirror. I drove it home without any problems, and the alignment wasn't off at all (that I could tell). I will be taking it into my buddy's shop tomorrow or Wednesday where I have a lifetime alignment plan, and he'll double check the whole suspension to make sure everything is fine. Until then, I won't be driving at all.
Story: While driving up to Bucks County (about a hour away) to pick a few random parts for the Civic, it started to rain. No big deal. I got off the highway, as my GPS instructed me to, and continued down a road following a mini-van. It's begins to pour, and then hail..maybe like the size of nickels or so, then everyone in the front of me slams on their brakes. I hit the brakes, and moved away from hitting the back of the van.
I ended up destroying about 5 little bushes and running into the big bush you see in the pic. Since it was raining, I couldn't get traction in order to back out. Cops came and had a tow truck pull me out (which cost $115....ugh.. hopefully, insurance will take care of some of that.) Here's some more pics of the damage. They are from my cell phone, so the quality may not be the best.
All in all, I need at least a new front bumper, pass. fender, and pass. side mirror. I drove it home without any problems, and the alignment wasn't off at all (that I could tell). I will be taking it into my buddy's shop tomorrow or Wednesday where I have a lifetime alignment plan, and he'll double check the whole suspension to make sure everything is fine. Until then, I won't be driving at all.
#72
06-15-2009, 06:30 PM
Recognized HCF Member
Join Date: Jun 2006
Location: Brownsburg, IN 46112
Posts: 11,203
dam that sucks! at least its not that bad!


#75
06-16-2009, 10:53 AM
Recognized HCF Member
Join Date: Jun 2006
Location: Brownsburg, IN 46112
Posts: 11,203
to bad its not the other side....
id have a fender for you and you could order a pair of mirrors and sell me the passenger side one.LOL mines loose as hell!
well think of the positive... with the insurance money you can buy new headlights as well
id have a fender for you and you could order a pair of mirrors and sell me the passenger side one.LOL mines loose as hell!
well think of the positive... with the insurance money you can buy new headlights as well
#76
06-16-2009, 05:40 PM
Not going through insurance actually. I called certifit and was happily surprised. $35 for a bumper and $29 for passenger fender. Addiction, I need a new passenger mirror, I would be able to sell you the driver one if I bought a pair.
I am in process of actually fabbing up a fix for the mirror. The mirror and housing itself are untouch. The only thing broken are the wires (just going to solder them back together) and the plastic piece that screws into the inside of the mirror and has the three studs that go into the door behind the tweeter. I'll post up pics tomorrow of what I did.
I am in process of actually fabbing up a fix for the mirror. The mirror and housing itself are untouch. The only thing broken are the wires (just going to solder them back together) and the plastic piece that screws into the inside of the mirror and has the three studs that go into the door behind the tweeter. I'll post up pics tomorrow of what I did.
#77
06-16-2009, 05:55 PM
Recognized HCF Member
Join Date: Jun 2006
Location: Brownsburg, IN 46112
Posts: 11,203
na i was saying i also need the passenger side mirror.LOL i was saying to bad it didnt take out the other side for you.LOL
and the body panels are pretty cheap but you gotta also figure in paint... dont forget to sand the bumper and use plastic bumper promoter and then paint
just be glad it didnt mess the hood up. shipping cost on that sucker SUCKS!
and the body panels are pretty cheap but you gotta also figure in paint... dont forget to sand the bumper and use plastic bumper promoter and then paint
just be glad it didnt mess the hood up. shipping cost on that sucker SUCKS!
#78
06-17-2009, 06:12 PM
^^ I wish it was the driver's side, too. I bought the car with a little body damage right behind the driver door, and I have to stare at it every time I get into my car. Also, the hood, has the littlest-tiniest dent in it. You may be able to see it in future pics.
I got a lot of work done with the car yesterday. I remove the entire front end of the car, cleaned all the dirt out with simple green, and put everything back together. I only had to use a total 3 washers in order to get everything looking straight. Here's a pic of most everything removed and bagged.
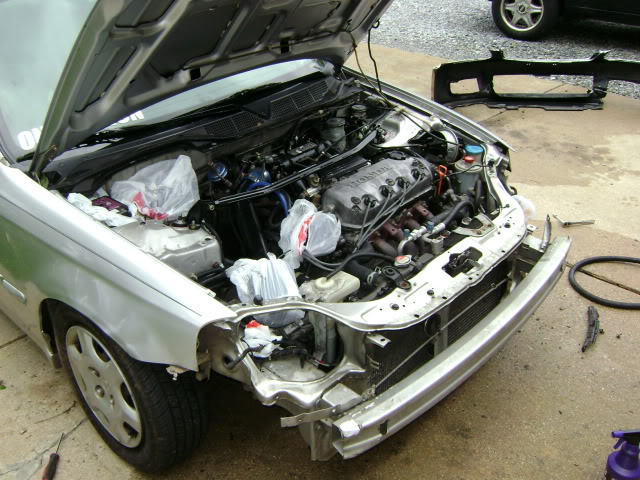
Afterwards:
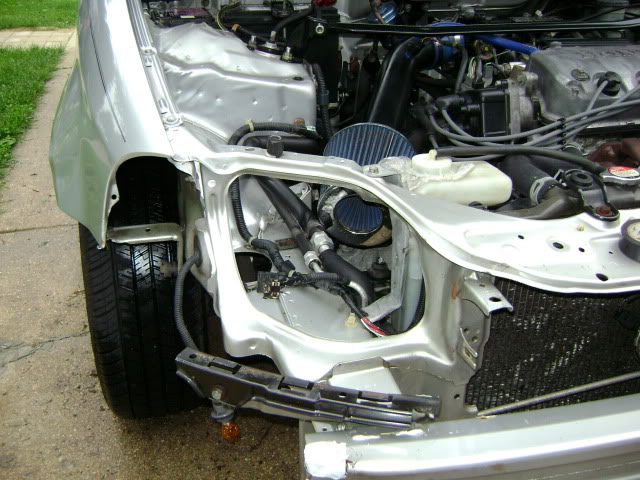
Not a huge difference, but there was a layer of dirt underneath my car after hosing everything off.
Now on to the fun part. I spent about 5 hours total working on the mirror, and I have gotten it fixed! I just have to re-wire it real quick to make sure the electric motor that moves the mirror still works. I would have done that today, but it was raining. On to the pics!
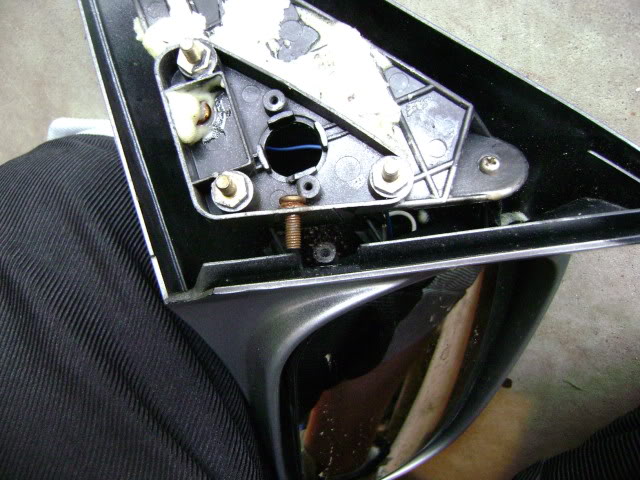
Here is a pic of the remaining plastic on the door
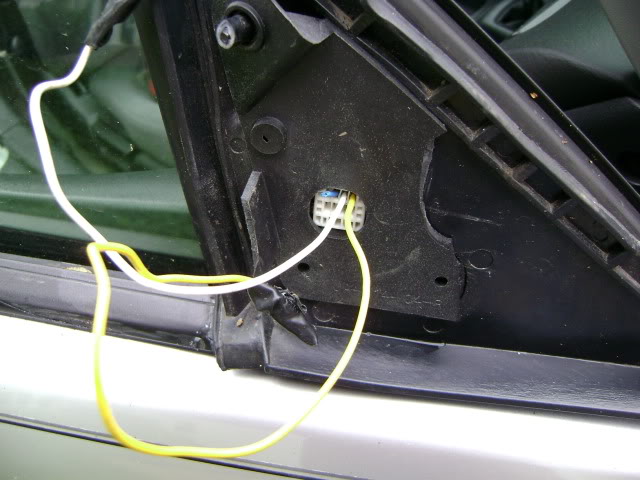
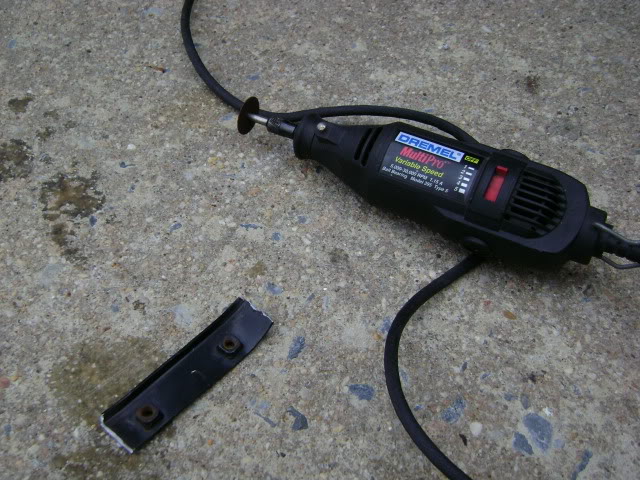
I removed all the plastic off the mirror and off the door. I then grabbed my fog light bracket and decided to use this to help keep the plastic together.
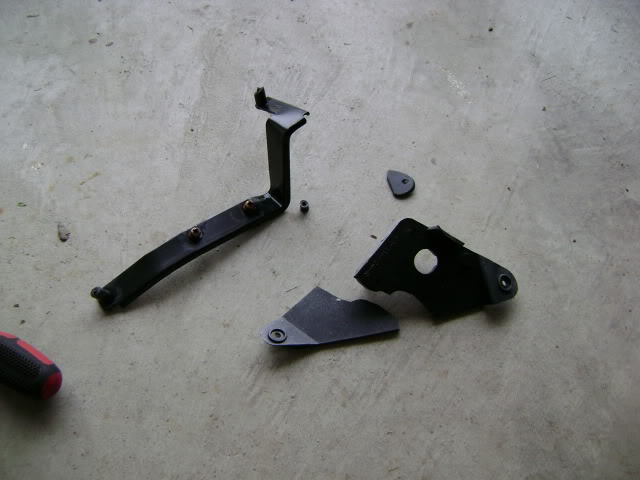
Here's one of the fabricated pieces I made from the bracket. The other one is the same, but a little shorter. (Dremel FTW!)
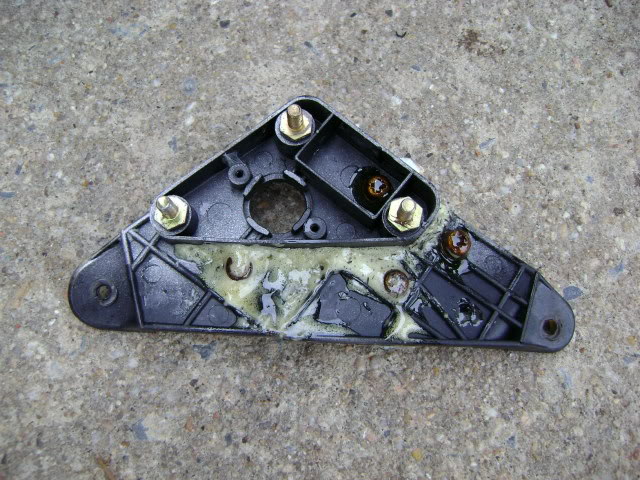
Once I was done making those two pieces, I then drilled holes in the plastic piece (that holds the mirror to the door) and attached the brackets with screws. I also used some gorilla glue to make sure nothing would move whatsoever.... I am still trying to pick the gorilla glue off of my fingers.

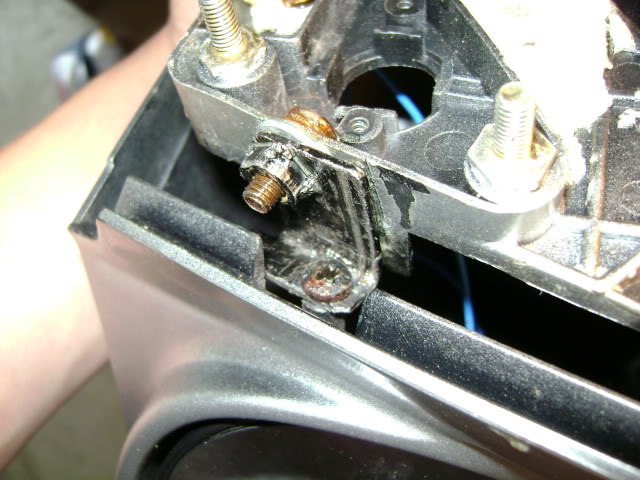
Here was my last problem regarding the mirror... (don't mind the brown screw, I decided to take this pic after it was fixed)
Without that being connected, the mirror was only being held on by two screws, and would wobble up and down a little bit. Definitely not good because the next time I go 80mph on a highway, I don't want to worry about the mirror breaking and flying off. So I needed one more metal bracket that had like a 115 degree angle. This is what I created.
Test fitted the mirror (took it back off to mess with the wiring), and everything looks straight! No wobbling at all. I'll post up some pics of the mirror on the door once I get the wiring situated.
Let me know what you guys think! BTW, I know this was a lot of work for an easily replaceable $30-35 mirror (then add time and $$$ for paint). But right now, I have no additional money to throw around. Any dime I can save, I will.
I got a lot of work done with the car yesterday. I remove the entire front end of the car, cleaned all the dirt out with simple green, and put everything back together. I only had to use a total 3 washers in order to get everything looking straight. Here's a pic of most everything removed and bagged.
Afterwards:
Not a huge difference, but there was a layer of dirt underneath my car after hosing everything off.
Now on to the fun part. I spent about 5 hours total working on the mirror, and I have gotten it fixed! I just have to re-wire it real quick to make sure the electric motor that moves the mirror still works. I would have done that today, but it was raining. On to the pics!
Here is a pic of the remaining plastic on the door
I removed all the plastic off the mirror and off the door. I then grabbed my fog light bracket and decided to use this to help keep the plastic together.
Here's one of the fabricated pieces I made from the bracket. The other one is the same, but a little shorter. (Dremel FTW!)
Once I was done making those two pieces, I then drilled holes in the plastic piece (that holds the mirror to the door) and attached the brackets with screws. I also used some gorilla glue to make sure nothing would move whatsoever.... I am still trying to pick the gorilla glue off of my fingers.
Here was my last problem regarding the mirror... (don't mind the brown screw, I decided to take this pic after it was fixed)
Without that being connected, the mirror was only being held on by two screws, and would wobble up and down a little bit. Definitely not good because the next time I go 80mph on a highway, I don't want to worry about the mirror breaking and flying off. So I needed one more metal bracket that had like a 115 degree angle. This is what I created.
Test fitted the mirror (took it back off to mess with the wiring), and everything looks straight! No wobbling at all. I'll post up some pics of the mirror on the door once I get the wiring situated.
Let me know what you guys think! BTW, I know this was a lot of work for an easily replaceable $30-35 mirror (then add time and $$$ for paint). But right now, I have no additional money to throw around. Any dime I can save, I will.
Last edited by cvcrcr99; 06-17-2009 at 06:14 PM.
